How to assemble compact safety kits for BC earthquakes
Posted by Karl Lundgren on
TL;DR:
- Knowing how to assemble compact safety kits in advance is crucial for BC residents to ensure 72-hour self-sufficiency during earthquakes. The kits should be lightweight, portable, and include essentials such as water, food, first aid supplies, communication tools, and personal documents. Regularly reviewing, updating, and customizing kits for different household members and locations enhances preparedness and response capabilities.
When a major earthquake strikes coastal British Columbia, you will not have time to search your home for supplies. Knowing how to assemble compact safety kits in advance is one of the most practical steps any BC resident can take. PreparedBC recommends storing your emergency supplies in easy-to-carry containers you can grab and go within minutes. This guide walks you through exactly what to include, how to pack it, and how to tailor your kit to your family’s specific needs, so that when the ground shakes, you are already ready.
Table of Contents
- Understanding the essentials of compact earthquake safety kits
- Step-by-step guide to assembling your compact safety kit
- Common mistakes and how to avoid them when building compact kits
- Ensuring your kit meets BC family needs and multiple locations
- Why compact kits must balance survival and response capabilities
- Find reliable compact earthquake kits and supplies in BC
- Frequently asked questions
Key Takeaways
| Point | Details |
|---|---|
| 72-hour preparedness | Compact safety kits in BC should support survival for at least 72 hours without outside help. |
| Weight management | Keep your grab-and-go kit weight under 25% of your body weight to ensure portability under stress. |
| Essential items | Include water, food, communication tools, first aid, and important documents in every compact kit. |
| Regular maintenance | Check and rotate your kit’s supplies every six months to keep everything usable and up to date. |
| Multiple kits for multiple locations | Prepare smaller versions of your kit for home, work, and vehicle to cover where you spend most time. |
Understanding the essentials of compact earthquake safety kits
The foundation of any effective kit is knowing the minimum standard: 72-hour self-sufficiency. Emergency management experts and the Insurance Bureau of Canada confirm that 72-hour preparedness is the baseline every BC household should meet, because that is roughly how long it may take for organised emergency services to reach you after a major Cascadia Subduction Zone event.
Weight is the other non-negotiable factor. A kit you cannot carry is a kit you will leave behind. The Regional District of Nanaimo advises that a grab-and-go backpack should weigh no more than about one-quarter of the carrier’s body weight. For a 70-kilogram adult, that means keeping the total pack weight under roughly 17 kilograms. For children and older adults, the limit is even lower.
Compactness forces you to make deliberate choices about what earns a place in your kit. The core categories are consistent across all authoritative guidance:
- Water: At least four litres per person per day for drinking and hygiene
- Food: Non-perishable, calorie-dense items requiring little or no cooking
- First aid: Compact first aid supplies covering wounds, medications, and basic trauma
- Communication: A battery-powered or hand-crank radio, a whistle, and a fully charged portable battery pack
- Documentation: Waterproof copies of identification, insurance, and emergency contact lists
- Lighting and tools: A compact headlamp, spare batteries, a multi-tool, and work gloves
- Sanitation: Hand sanitiser, waste bags, and personal hygiene essentials
The table below shows a practical weight guide for assembling a compact kit by household member type.
| Household member | Max kit weight | Priority additions |
|---|---|---|
| Active adult (60-90 kg) | 15-22 kg | Full 72-hour supplies |
| Older adult or teen | 8-12 kg | Medications, lighter food |
| Child (6-12 years) | 3-5 kg | Comfort items, snacks, ID |
| Pet owner | +2-3 kg | Pet food, leash, records |
You can review a detailed breakdown of BC emergency kit essentials to confirm your list covers all recommended categories before you start packing.
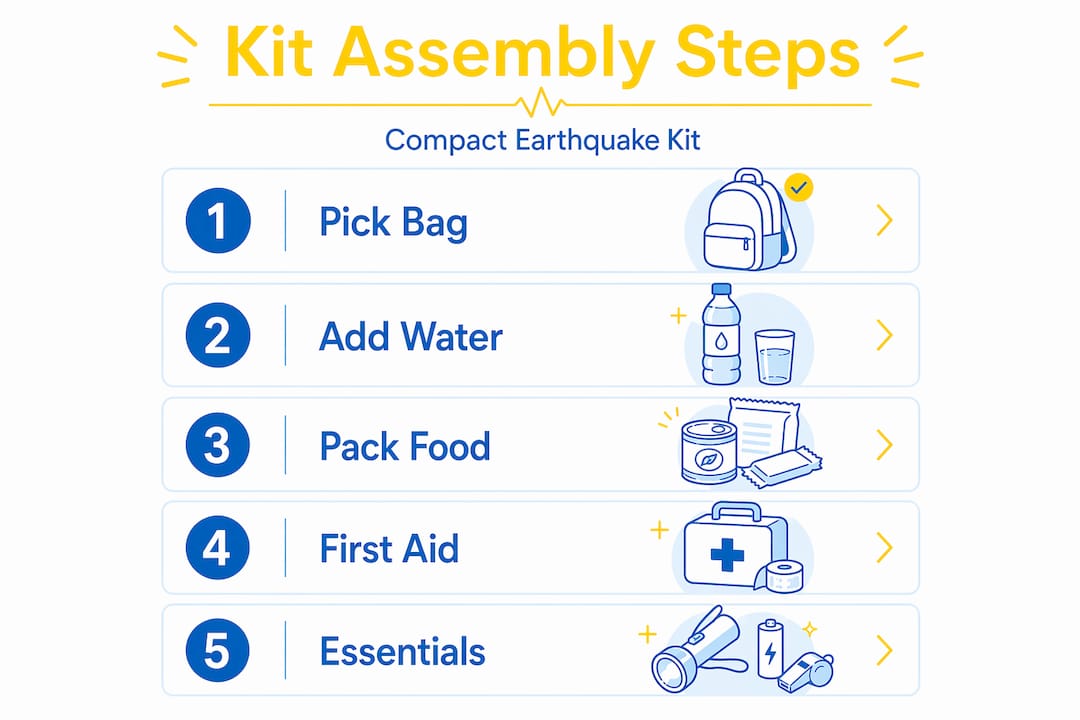
Step-by-step guide to assembling your compact safety kit
Knowing what to include, let’s walk through assembling your kit step-by-step.
Step 1: Choose your container. PreparedBC and regional authorities recommend waterproof backpacks or duffel bags as your primary container. Look for a pack with padded shoulder straps, a waist belt for load distribution, and outer pockets for items you will need immediately such as a flashlight, whistle, or documents.
Step 2: Pack water first. Water is the heaviest item and also the most critical. Pack sealed water pouches rather than large jugs to keep weight distributed evenly. Four litres per person per day for 72 hours adds up quickly, so for families, vehicle kits can supplement with additional water storage.
Step 3: Add food. Choose compact, high-calorie options: energy bars, vacuum-sealed meals, dried fruit, and nut butter packets. The Ready.gov emergency checklist also recommends including a manual can opener if you include tinned goods.
Step 4: Assemble your compact first aid supplies. A pre-packaged first aid kit can form the base, but personalise it. Add any prescription medications, allergy treatments, and a small trauma kit that includes a tourniquet and wound packing gauze. Multi-function items, such as a bandana that can serve as a sling or dust mask, save space.
Step 5: Add communication and navigation tools. A battery-powered radio keeps you informed when cell networks fail. A physical map of your local area is more reliable than a phone when power is out.
Step 6: Include your documents. Place waterproof copies of identification, insurance policies, emergency contacts, and your household emergency plan in a sealed bag inside the main compartment.
Step 7: Label and store it properly. Use a bright luggage tag or marker to label each kit with the owner’s name and any medical needs. Store kits near an exit but away from areas prone to falling objects.
Step 8: Review every six months. Rotate perishables on a calendar reminder, check battery charge levels, and adjust clothing for seasonal changes.
Pro Tip: Pack your kit in priority order. Items you need first, such as your flashlight, whistle, and documents, go in the top or outer pockets. Heavier items like water go closest to your back to improve carrying balance.
Compare container types using the table below to find the best fit for your household.
| Container type | Best for | Trade-offs |
|---|---|---|
| Waterproof backpack | Individuals, quick evacuation | Limited volume for families |
| Rolling duffel bag | Families, short distances | Harder to carry over debris |
| Hard-sided waterproof case | Vehicle kits, document storage | Heavy, less portable |
| Soft duffel bag | Secondary or work kit | Not waterproof without liner |
For more guidance on how to keep your supplies organised and accessible, see these kit organisation tips and consider reviewing the full personal supplies checklist to fill any gaps.
Common mistakes and how to avoid them when building compact kits
Next, let’s address mistakes many make and how to avoid them for an effective kit.
The most frequent problem is overpacking. Residents pile in items they “might” need until the bag is too heavy to lift quickly. Most grab-and-go kits fail because of excess weight, poor access to stored items, and supplies that have long since expired. If you cannot put the pack on and walk briskly, it needs to be lighter.
The second common mistake is treating a compact kit as a minor first aid box. A small adhesive bandage collection is not enough. The IBC advises preparing to manage life-threatening injuries for 72 hours or more, not just scrapes and bruises. A tourniquet, hemostatic gauze, and a SAM splint take up very little space and could save a life.
Here are the most critical mistakes to avoid:
- Ignoring expiry dates on food, water pouches, and medications. Set a calendar reminder for every April and October.
- Storing your kit in an inconvenient location, such as a locked storage room or high shelf. It must be reachable in under 60 seconds.
- Forgetting personal prescription medications. Missing one dose of a critical medication can be as dangerous as the earthquake itself.
- Using a bag that is not waterproof or at least water-resistant. Flooding and rain are common in BC post-earthquake scenarios.
- Packing everything loose instead of in labelled pouches. In a dark, stressful situation, you need to find items by feel and touch.
“A safety kit that cannot be grabbed and used quickly under stress is not a safety kit. It is a storage box.”
Pro Tip: Do a timed drill once a year. Grab your kit, put it on, and walk out your front door. If it takes more than two minutes or leaves you breathless on the front step, something needs to change.
You can find practical guidance on where and how to store your supplies in this kit storage tips resource.
Ensuring your kit meets BC family needs and multiple locations
With kit assembly best practices clear, let’s consider how to tailor kits for families and multiple sites.
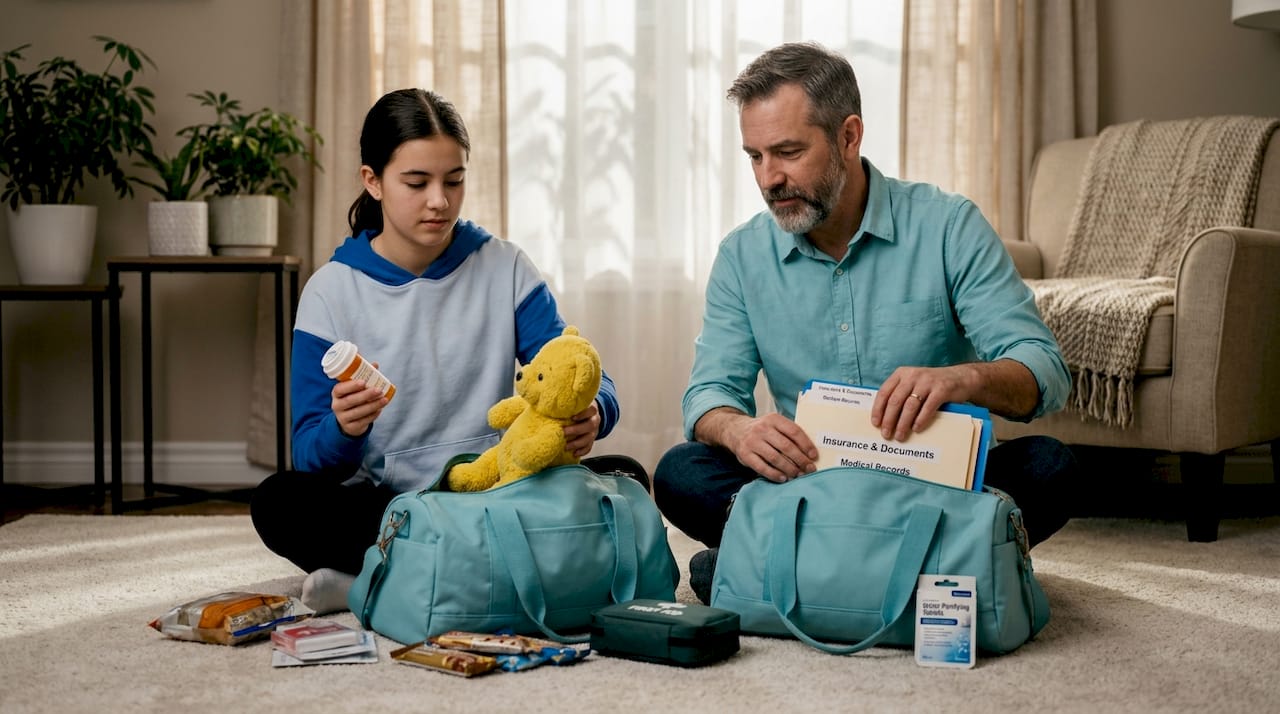
No two households in BC have the same needs. A family with young children, elderly parents, or members with chronic health conditions must plan beyond the standard checklist. The City of Surrey’s emergency preparedness guidance reminds residents to consider each member’s personal needs, including allergies, dietary restrictions, mobility limitations, and daily medications.
This personalisation extends to where your kits live. A major earthquake is just as likely to strike during the morning commute as it is at midnight. The Ready.gov framework recommends preparing smaller sub-kits for home, work, and vehicles, each sharing a common core of supplies but tailored to that setting.
Consider the following checklist when tailoring kits for your household:
- Include a spare pair of prescription glasses or contact lens supplies
- Pack infant formula, diapers, or baby food if applicable
- Add allergy medications and an EpiPen if anyone in your household has severe allergies
- Include a list of each family member’s blood type, medical conditions, and doctor contact
- For pets, add food, a leash, vaccination records, and a familiar toy or blanket
- Adjust clothing layers seasonally, particularly for BC’s wet winters and warm summers
| Kit location | Core additions | Container suggestion |
|---|---|---|
| Home (primary) | Full 72-hour kit per person | Waterproof backpack per adult |
| Workplace | 24-hour supplies, walking shoes | Small duffel or drawstring bag |
| Vehicle | Water, blanket, first aid, gloves | Hard case or trunk bag |
| School (child’s bag) | Snacks, ID card, comfort item | Small backpack insert |
For a thorough checklist covering every room and location in your household, the home preparedness checklist provides a practical starting point.
Why compact kits must balance survival and response capabilities
There is a framing problem that affects how many BC residents think about compact emergency kits. The word “compact” leads people to think small, and thinking small leads them toward building what amounts to a glorified first aid pouch. This is a critical error.
A compact kit is not the opposite of a capable kit. It is a tightly edited version of a complete one. The goal is not to pack less for the sake of being minimal. The goal is to eliminate redundancy while retaining both survival capacity and injury response capacity. Those are two distinct functions, and both must be present.
The IBC’s earthquake preparedness guidance frames this clearly: your kit needs to allow you to survive and respond, not just survive. That means food, water, and sanitation for 72 hours or more, alongside meaningful first aid tools for serious injuries. Compactness is achieved through item selection, not item elimination.
The most useful lens for building your kit is asking: “Does this item do more than one job?” A headlamp beats a flashlight because your hands stay free. A multi-tool replaces several individual tools. A mylar emergency blanket serves as insulation, a rain barrier, and a signalling device. Choosing multi-function items lets you stay within weight limits without sacrificing coverage.
BC residents who have lived through smaller seismic events know that the aftermath is disorienting. Roads are compromised. Cell networks are overloaded. Emergency services are stretched. Your kit may be the only resource you have for the first 72 hours, and possibly longer. Treat it accordingly. You can explore how to build a complete kit that meets these standards in the emergency kit guide 2026.
Find reliable compact earthquake kits and supplies in BC
Building a compact kit from scratch takes research, time, and careful selection. If you want the confidence of knowing your kit already meets BC preparedness standards without spending weekends comparing products, EarthquakeKit.ca offers a practical shortcut.
Browse a range of basic earthquake kits designed for individuals and families, or explore provincial BC earthquake kits that align with government recommendations for BC residents. Need to fill specific gaps in your existing kit? The personal earthquake supplies section lets you add exactly what your household needs, from compact first aid supplies to communication tools, without buying a full kit you do not need.
Frequently asked questions
How often should I check and update my compact safety kit supplies?
You should check your kit every six months to replace expired food, water, and medications, and to swap out seasonal clothing items for the current time of year.
What is the recommended water amount per person for a compact earthquake kit in BC?
Prepare four litres per person per day for drinking and sanitation needs, covering at least 72 hours as a minimum.
Can I include prescription medications in my compact safety kit?
Yes. Personal medications, including prescriptions, must be in your kit and rotated regularly so they remain within their expiry date and are effective when needed.
Why is it important to keep the kit weight below 25% of your body weight?
A backpack exceeding one-quarter of your body weight becomes difficult to carry quickly over uneven terrain or debris, which is precisely the condition you will face after a significant earthquake.
Should I prepare more than one compact kit for different locations?
Absolutely. Preparing sub-kits for home, work, and vehicles ensures you have access to essential supplies regardless of where you are when an earthquake occurs.